News and Updates

Tech Tip Tuesday: Screenshots in macOS and ChromeOS

Last week’s Tech Tip provided info on taking and editing screenshots in Windows using Snip & Sketch. But what about people using Macs and Chromebooks?

Apple Support offers clear instructions on how to take screenshots in macOS. Macworld also gives you a rundown on how to edit your screenshots on a Mac.

Chromebook users can check out Google’s own guide to screenshots in ChromeOS. Once you’ve taken your screenshot, ChromeOS offers a basic photo editor to make simple edits.

Subscribe to get LITS News and Updates in your inbox.

Tech Tip Tuesday: Searching in Gmail

Have you ever been certain you received an email (or sent one), but you aren’t sure how to find it so you can view it again?

Fortunately, your Allegheny account with Gmail offers you a rich variety of ways to search for those, using the search bar at the top of your Gmail inbox page. Here are just a few:

There are many more ways to conduct a search in Gmail. Visit the Gmail Help Center to learn more about searching in Gmail.

Subscribe to get LITS News and Updates in your inbox.

Brief OpenAthens outage

OpenAthens authentication went down briefly this afternoon (Tuesday, November 15, 2021). OpenAthens is the system that allows Allegheny students and faculty access to most of our databases and our interlibrary loan system, EZBorrow. When users tried to log into anything using OpenAthens, they were seeing a 404 error. The problem was quickly resolved. If you encounter issues accessing any of our databases or EZBorrow, please try clearing your browser history and trying again. If that does not resolve the problem, please open a Web Help Desk ticket so LITS can help troubleshoot.

Tech Tip Tuesday: Transitioning to New Google Sites

If your organization or department is still using the classic Google Sites service for a web page, please remember to transition to the new Google Sites interface before the end of the year. Google will phase out classic Sites with new Sites, with updated features and a new interface.

Here are the steps to convert a classic Google Site to use new Google Sites:

  1. Open your Google Site.
  2. Click on the Settings icon (the little gear in the upper right corner.)
    Screenshot of the Settings menu in classic Google Sites, highlighting the "Manage Site" option
  3. Choose Manage site.
  4. In the side menu, choose Convert to new Sites.
    Screenshot of the side menu in the Manage sites interface of classic Google Sites, highlighting "Convert to new Sites"
  5. Follow the on-screen instructions to complete the conversion.
  6. Note that you will need to do this for each individual Google Site you maintain.
Learn more about transitioning from classic Google Sites to the new Google Sites.
Subscribe to get LITS News and Updates in your inbox.

Tech Tip Tuesday: Keep Your Device’s Operating System Up to Date

If you use a smartphone or tablet, it’s important to keep the operating system (OS) up to date. Doing so can help avoid security risks, improve performance, and keep everything running smoothly.

blurred photo of a person holding a tablet

Taking the steps outlined on this page from the Federal Communications Commission both for before and after the update will help make the transition to the updated OS as seamless as possible.

Remember that each type of device uses a specific OS, and the update process for each OS is a little different.

The OS used by Apple mobile devices such as iPads and iPhones is known as iOS. Here’s how to update iOS on your mobile device.

Android devices are a little more complex, because different manufacturers may customize the OS in different ways, and the update methods vary a little with each successive version of the OS. Google provides instructions that will work on most devices for updating your Android OS.

Learn more about adopting safer habits with your devices at Allegheny.

Subscribe to get LITS News and Updates in your inbox.

Tech Tip Tuesday: Create Meeting Notes in a Calendar Event

Now you can create a document for your meeting notes right when you schedule an event in Google Calendar, in addition to adding other attachments.

Here’s how:

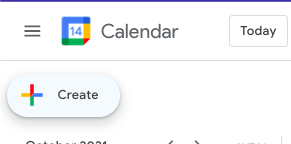
  1. From within Google Calendar in a web browser, choose Create.
    Screenshot of the "Create" button in the Google Calendar web interface
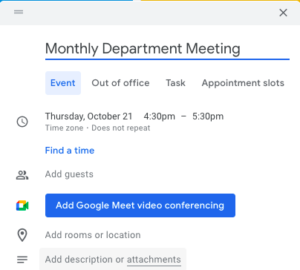
  2. Set the options for the meeting, such as the date, time, title, and guests.
  3. Choose Add description or attachments.
    Screenshot of the event creation dialog in the Google Calendar web interface
  4. If you have other documents in your Google Drive to attach to the meeting, use the dialog box to choose those.
    If not, choose Cancel.
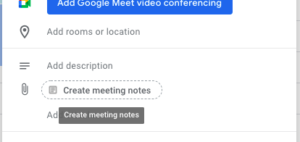
  5. After you close that dialog box, you will find an option to Create Meeting Notes.
    Screenshot of the "Create Meeting Notes" option in a meeting creation dialog box in Google Calendar
  6. Creating a notes document from Calendar will automatically populate the document with the event information and attach the document to the event.
    Screenshot showing a meeting notes document listing in the event details in a Google Calendar event
  7. Choose Save. This will automatically create the document in the Google Drive of the person scheduling the meeting.
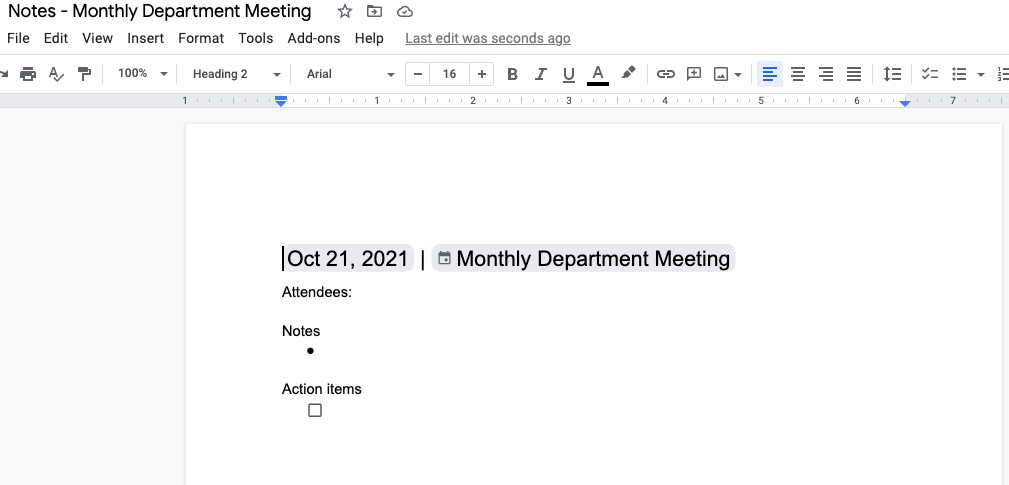
  8. The first time you open the meeting notes from within the Google Calendar event, it will be automatically populated with the meeting details and some common tools.
    Screenshot of the Meeting Notes document showing the basic tools and meeting details prepopulated
Remember:
  • Be aware that the meeting notes will be shared with all guests, including those outside Allegheny College (if any).
  • This feature is currently only available when creating events in a web browser; it is not yet available in the Google Calendar app on mobile devices.
  • Meeting notes can also be added in a similar fashion after the event is created.
  • Anyone with permission to edit the event details can add meeting notes.

Learn more about adding attachments to Google Calendar events.

Subscribe to get LITS News and Updates in your inbox.