Many Mac users create presentations in the Keynote app, but may need to share what they’ve created in a PowerPoint or Google Slides file format.
To save a copy of a Keynote presentation in another format, you export it in the new format. Any changes made to the exported presentation don’t affect the original.
Save a copy of a Keynote presentation in another format
- Open the presentation, then choose File > Export To > PowerPoint.
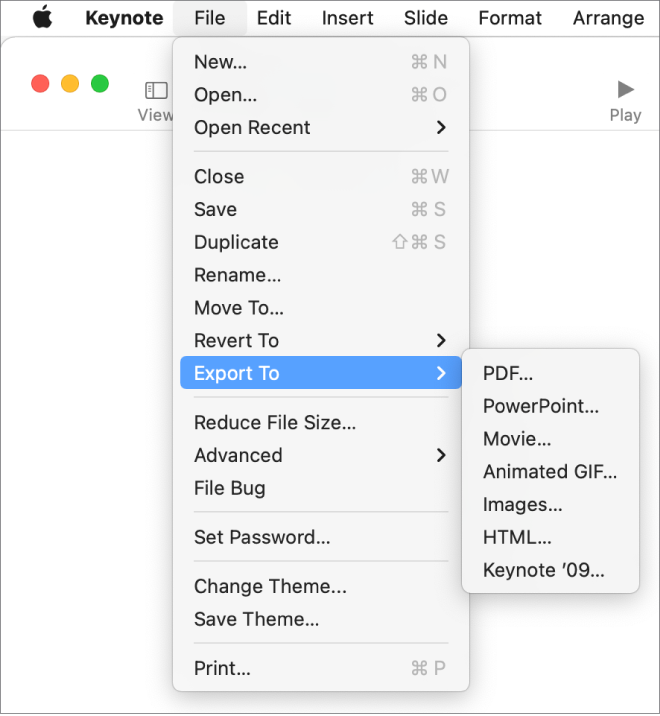
- You may be offered the option to set a password for the exported file, keep or change an existing password, or export without a password.
- Click Next, then type a name for the presentation.
- To choose where to save the presentation, click the Where pop-up menu, choose a location, then click Export.
- Your exported file can now be opened in MS PowerPoint, or uploaded to your Google Slides.